

Why E2E Testing?
End-to-End testing is a critical phase in the software development lifecycle. It validates that your application works cohesively from start to finish, mimicking real-world scenarios.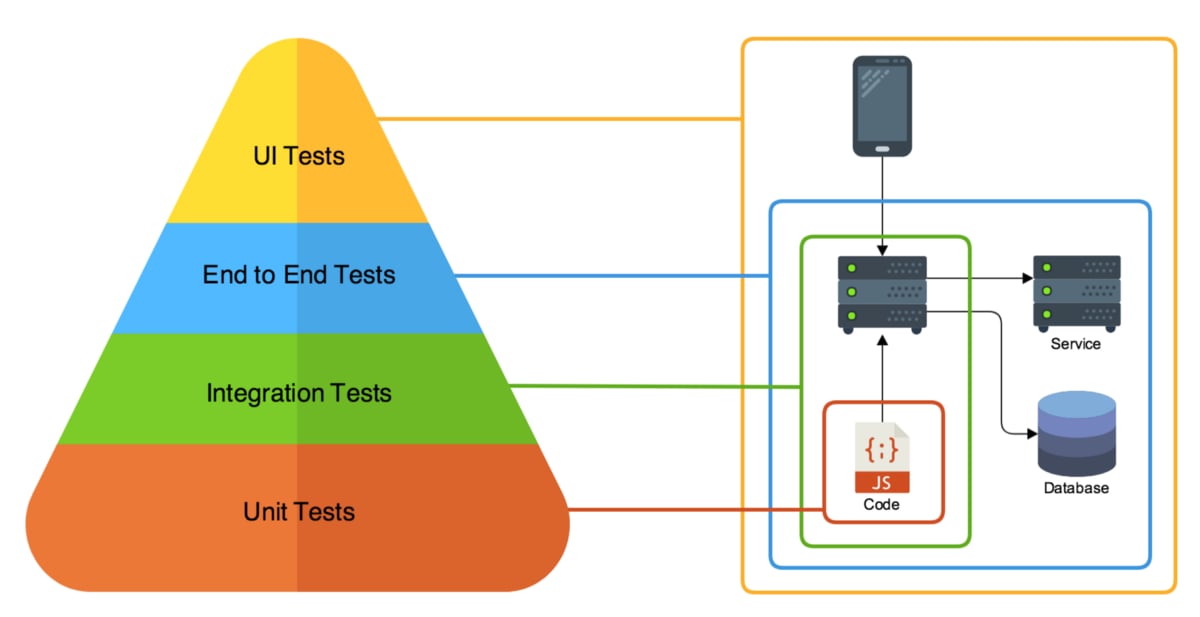
The Importance of Ephemeral Environments
In the world of DevOps and CI/CD, ephemeral environments (aka Preview Environments) serve as temporary, isolated setups where you can test your applications. These environments are increasingly vital in agile development frameworks where frequent changes are the norm. They can be provisioned quickly, teared down when no longer needed, and replicated easily. This means you can push your changes more rapidly into production with confidence.GitHub Actions and Qovery: A Perfect Match
GitHub Actions offers a powerful platform for automating workflows, allowing you to build, test, and deploy your code right from GitHub. Qovery, on the other hand, simplifies the provisioning and management of cloud resources, making it incredibly straightforward to set up ephemeral environments. When used in tandem, these tools provide a seamless, automated pipeline for E2E testing.What You’ll Learn
This guide is designed to walk you through the entire process of setting up an automated E2E testing pipeline. We’ll start by setting up GitHub Actions, move on to configuring ephemeral environments with Qovery, and finally, integrate these components into a cohesive, automated testing solution. By the end of this guide, you’ll have a fully operational E2E testing pipeline that will allow you to:- Automate your testing process
- Quickly provision and de-provision environments
- Integrate closely with your GitHub repository
- Save both time and operational costs
Prerequisites
You have sign in on Qovery
You have a GitHub account
For any questions, existing customers can reach out via Pylon directly in the Qovery console.
Tools
Here are the tools we will use in this guide:- Qovery for the infrastructure and the ephemeral environment
- GitHub Actions for the CI/CD pipeline
- K6 for the e2e tests
7 Steps to build E2E testing ephemeral environments with GitHub Actions and Qovery
Here is the big picture of what we will build: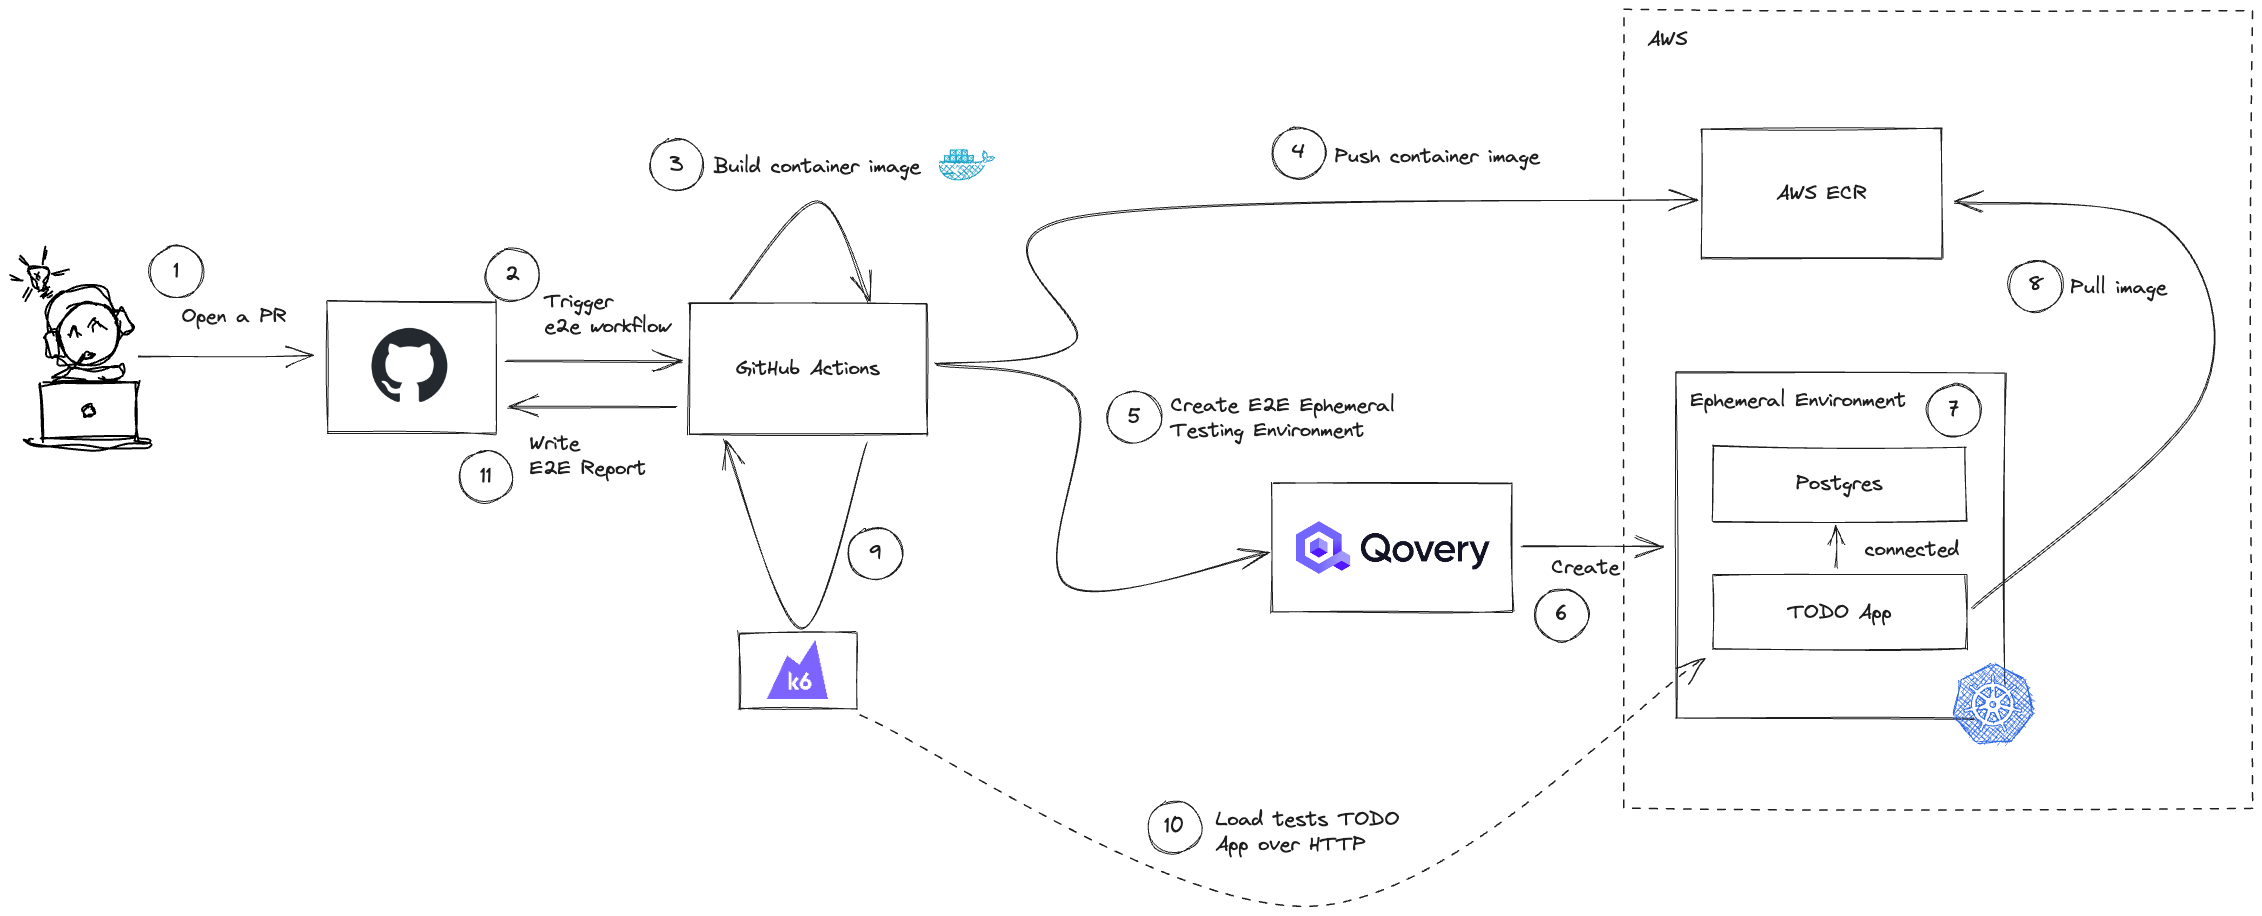
1. Prepare Qovery blueprint environment
If you are not already familiar with Qovery, I recommend you to What’s Qovery. In this guide, we will use Qovery to provision our ephemeral environments composed of a Java application (TODO app) and a PostgreSQL database. For this, we will create a blueprint environment that will be used as a template to create ephemeral environments.You can skip this part if you already have an environment that you want to use as a base for your ephemeral environments.
- Connect to Qovery.
- Create a new project.
- Create a new environment named
blueprint. - Add a PostgreSQL database inside your
blueprintenvironment. - Add a TODO app by using my ECR container registry where I push my image from GitHub Actions (cf next step).
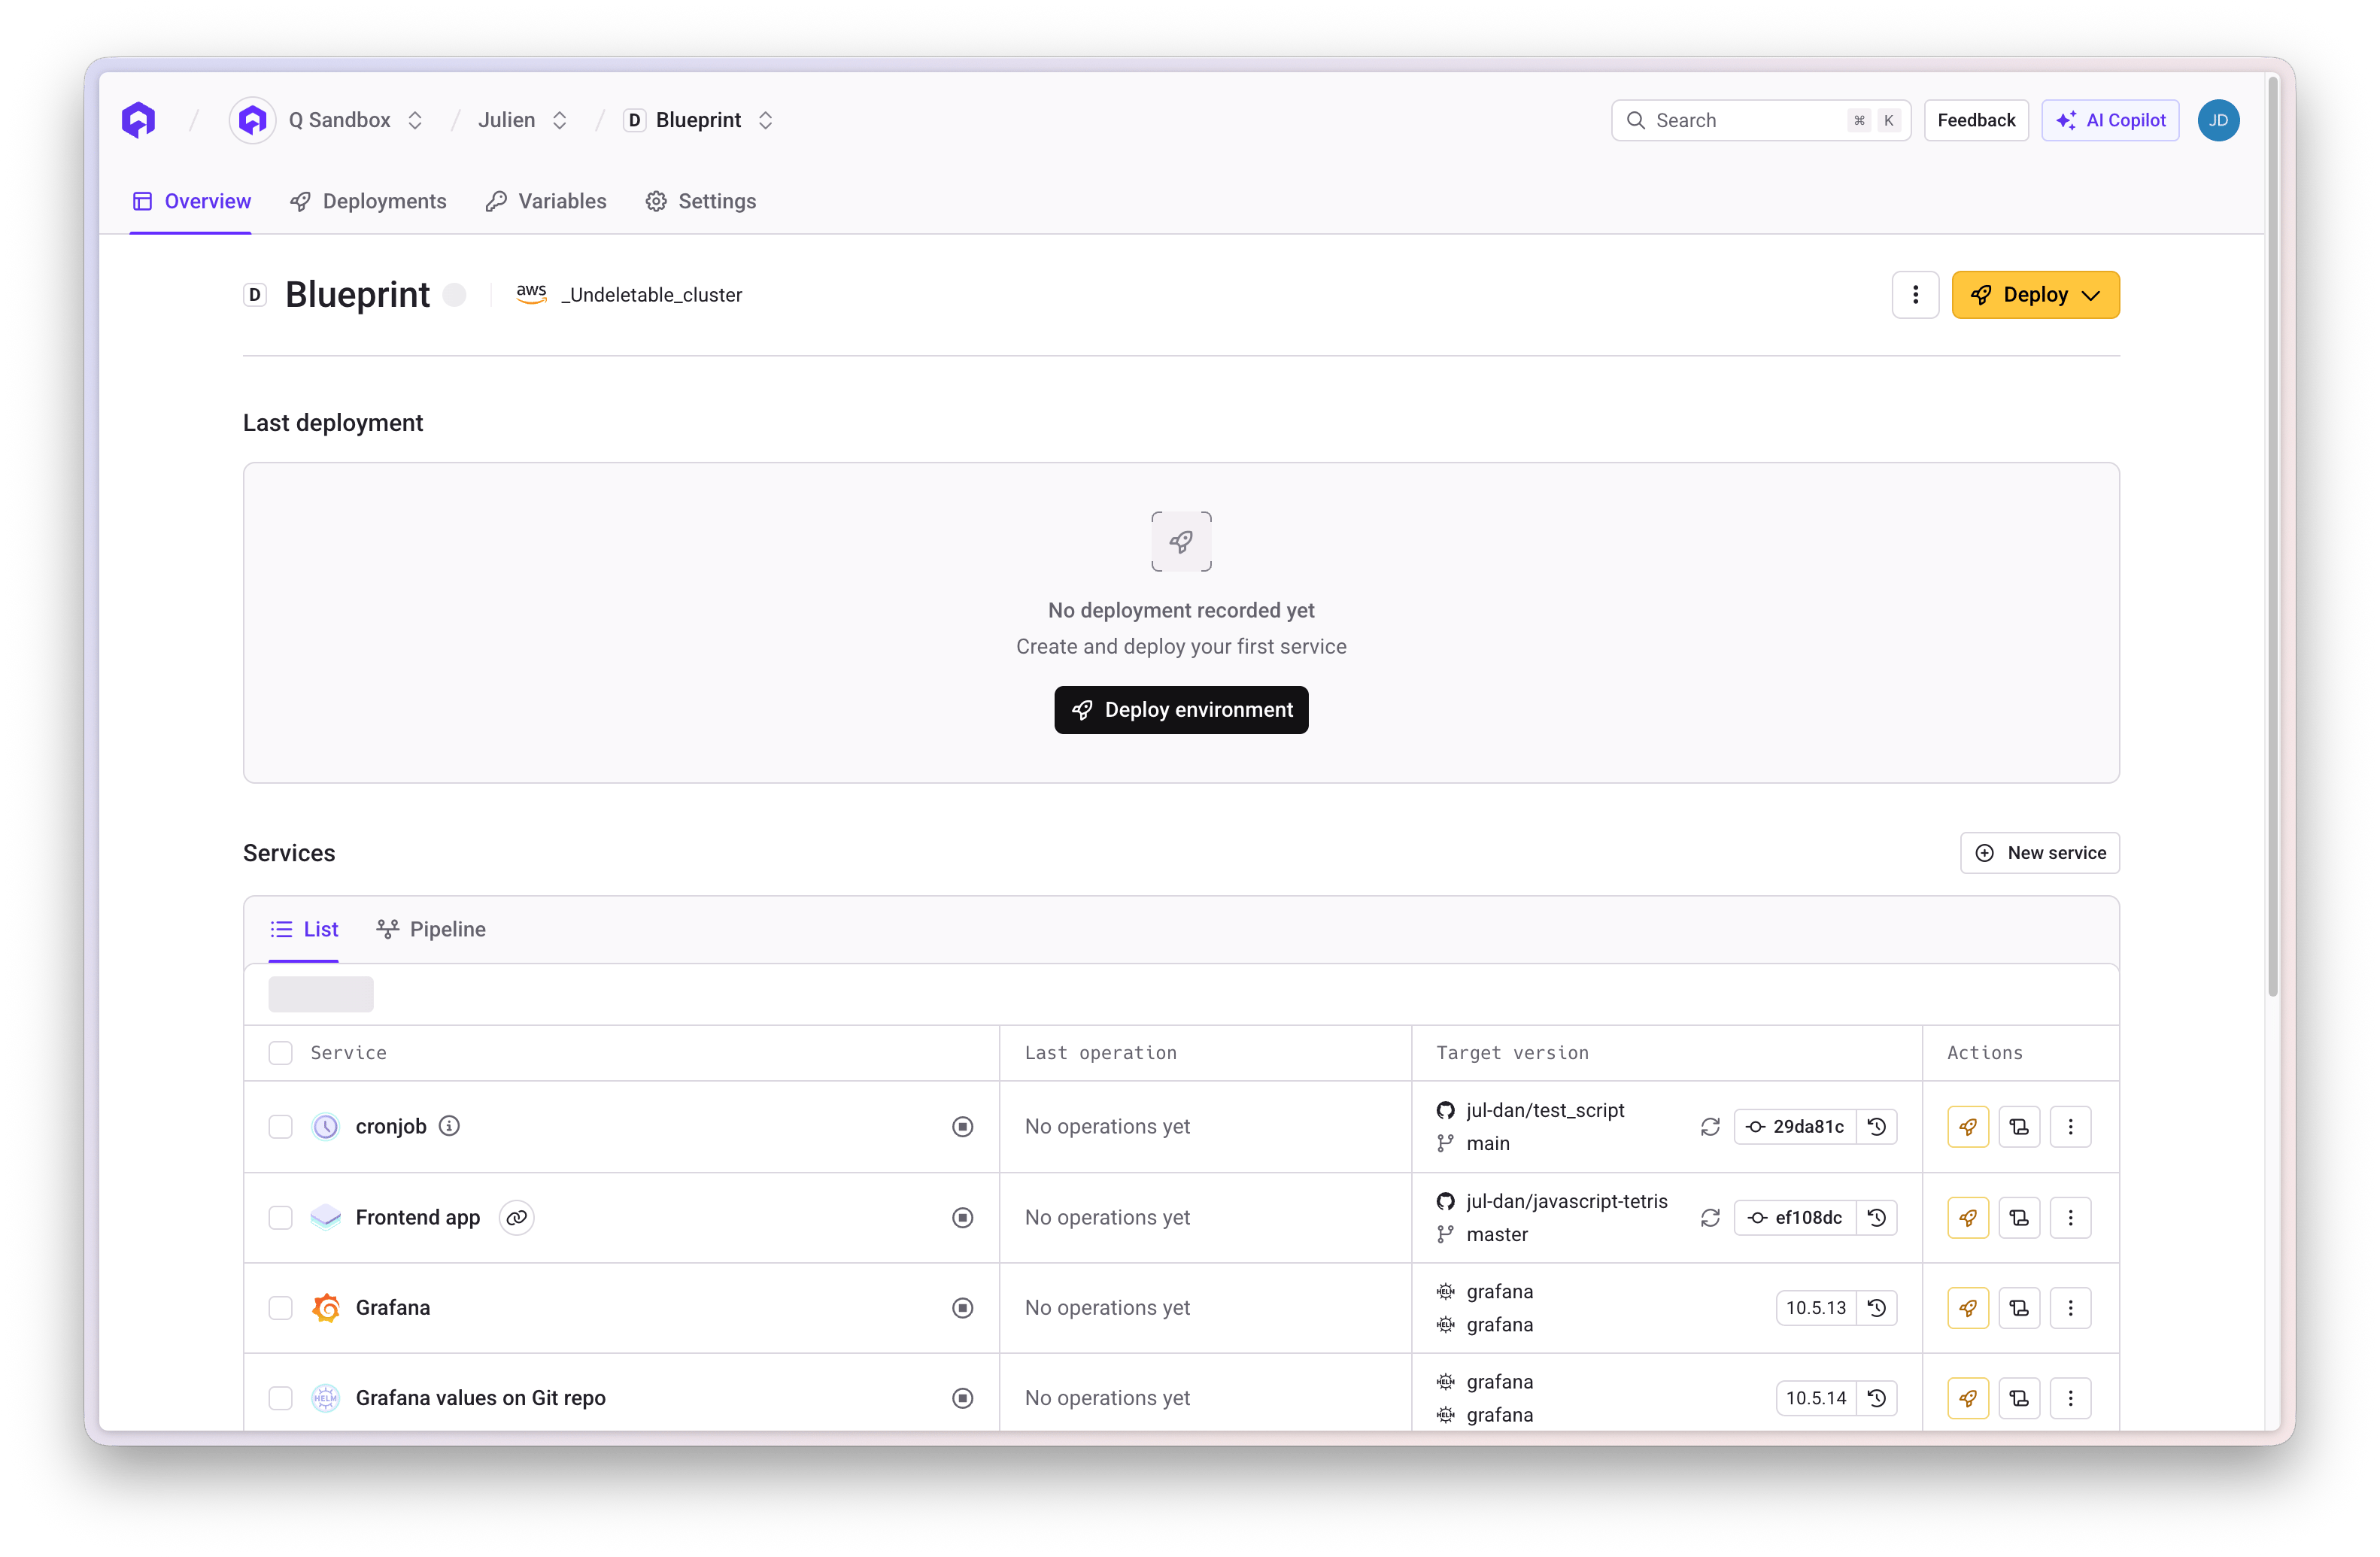
TODO app as an example, you need to properly configure the environment variables of the application. Here is a table with the environment variables you need to set:
You’re good to go! Now, let’s move on to the next step.
2. Build and push container image
In this step, we will build and push the container image of our application to our ECR container registry. We will use GitHub Actions to do that. Create your GitHub Actions workflow inside.github/workflows folder. I named mine build-and-push-image.yml. Here is the content of the file:
Find my complete file here
AWS_ACCESS_KEY_ID and AWS_SECRET_ACCESS_KEY are stored as GitHub secrets.
The ECR registry is also connected to my Qovery account - so I can pull the pushed image from Qovery as well.
3. Create an Ephemeral Environment with GitHub Actions and Qovery
In this step, we will create an ephemeral environment with GitHub Actions and Qovery. We will use the Qovery CLI inside our GitHub Actions workflow to do that. Create your GitHub Actions workflow inside.github/workflows folder. I named mine pull-request-run-e2e-tests.yml. Here is the content of the file:
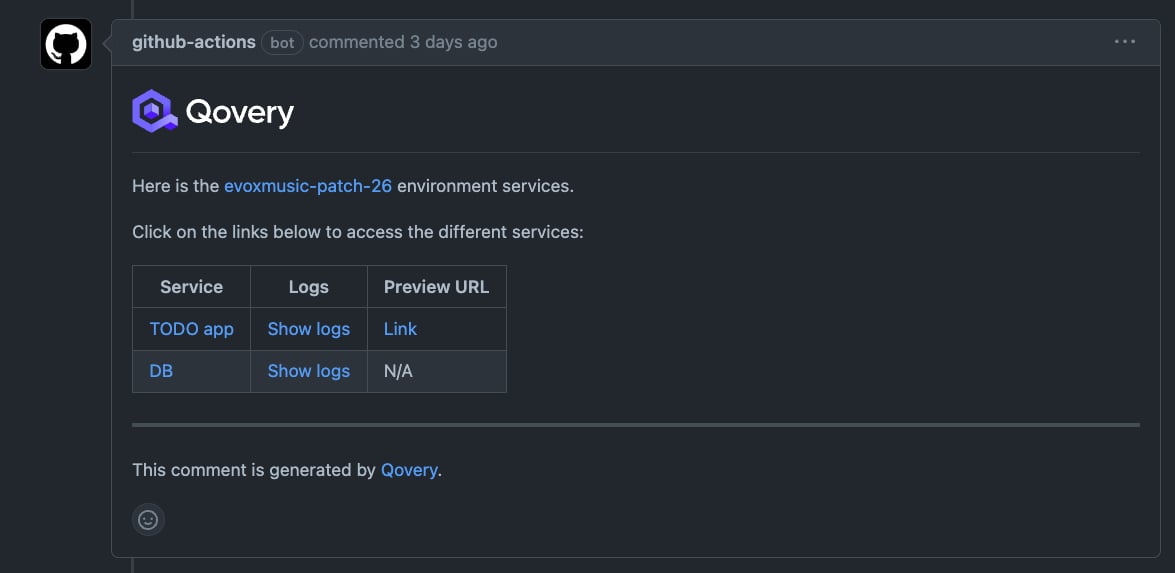
qovery environment clone command to clone our blueprint environment into a new environment. Then, we use the qovery container update command to update the container tag of our application. Finally, we use the qovery environment deploy command to deploy our application. The option -w is used to wait for the deployment to be completed. We also use the qovery service list command to get the status of our environment and store it in a GitHub output variable. This variable will be used in the next step to display the status of the environment in the Pull Request.
Find my complete file hereYou can see the result of this step in the Pull Request:
4. Run E2E tests with K6
In this step, we will run our E2E tests with K6. K6 is a modern load testing tool that allows you to write tests in JavaScript. It’s a great tool to run E2E tests as well. Here is the script we will use:The complete script is available hereWe will use the
setup function to add some data to our database. Then, we will use the default function to get the list of items from our API. We will use the options variable to define the number of users we want to simulate. In this example, we will simulate 100 users for 5 minutes. You can find more information about the options variable here.
To run our E2E tests, we will use the k6 run command inside our GitHub Actions workflow. Here is the content of the file:
The complete file is available hereWe use the
qovery container domain list command to get the domain of our application. Then, we use the k6 command to run our E2E tests. We store the result of the tests in a GitHub output variable.
The
qovery container domain list command returns ANSI color codes. We use the sed -e 's/\x1b\[[0-9;]*m//g' command to remove them.5. Display test results in Pull Request
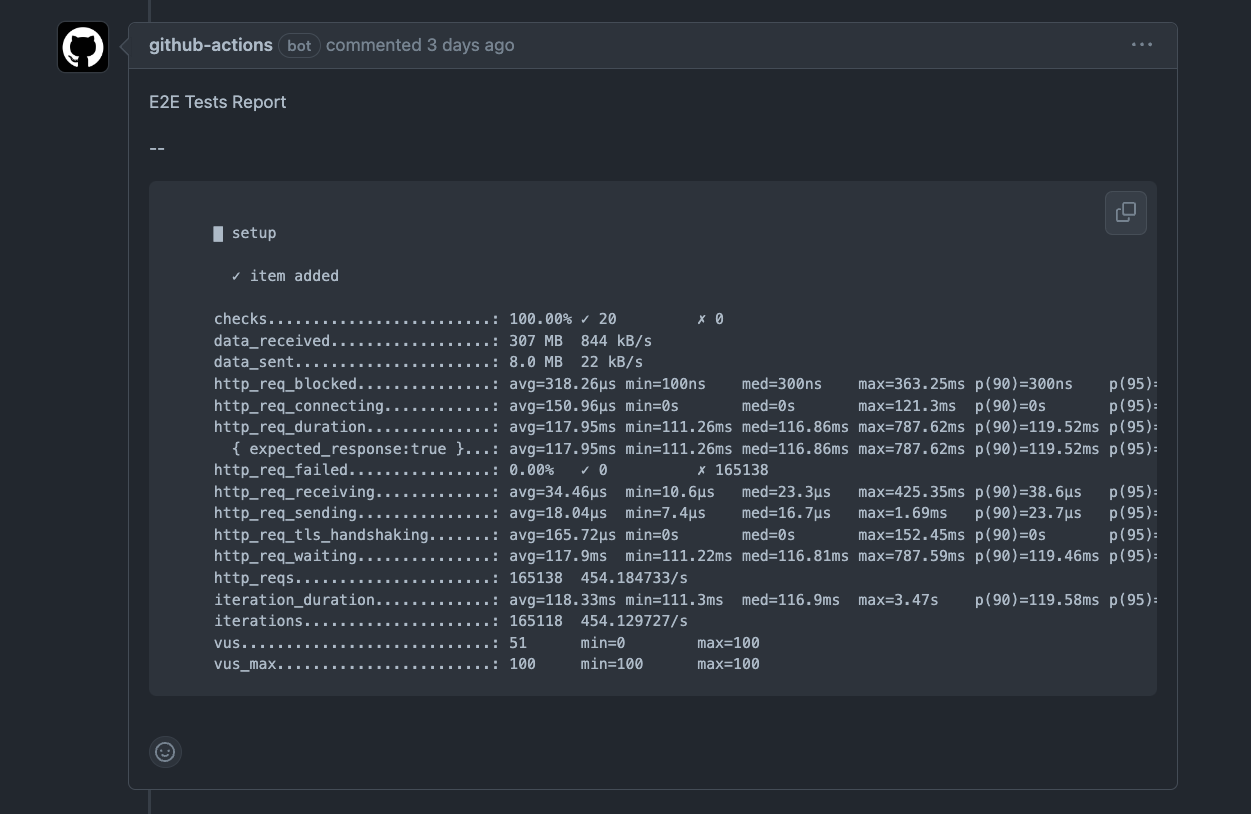
In this step, we will display the result of our E2E tests in the Pull Request. We will use the GitHub Actions output variables to do that. Here is the content of the file:The complete file is available hereYou can see the result of this step in the Pull Request:
6. Destroy Ephemeral Environment and clean up resources
Now we will destroy the ephemeral environment and clean up the resources when the Pull Request is closed or merged. Here is the yaml:The complete file is available hereWe just use the
qovery environment delete command to delete the ephemeral environment. The option -w is used to wait for the deletion to be completed. Qovery will automatically release the resources used by the environment.